To create a new road, path, or driveway, first click the ![]() button.
Then press the
button.
Then press the ![]() button to start a new road centreline. Or the
button to start a new road centreline. Or the ![]() button to start a new path or driveway centreline
button to start a new path or driveway centreline
The mouse cursor will be shown as a cross when over the drawing, indicating that you should click the start position for the road centreline.
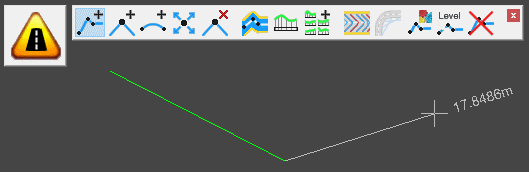
After clicking the start point, a line will be shown stretching to the mouse cursor position. Click the next point to place the line, and continue placing further IPs (Intersection Points) to describe the path of the road centreline.
If you have imported a layout drawing, the centreline may be indicated on the layout. In this case, there are some right-click menu options that can help to quickly add the centreline from the layout. Right clicking will bring up the following menu:
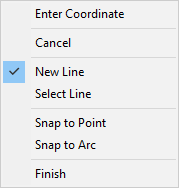
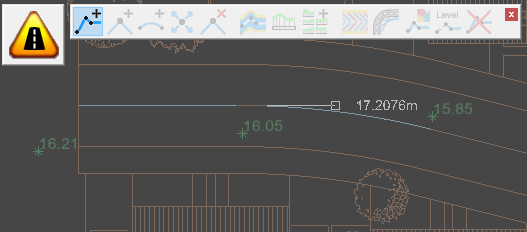
The Select Line option allows you to pick a polyline from a layout to create a centreline from. After choosing this option, the mouse will highlight the nearest polyline from a layout, click to select the highlighted polyline to create a centreline from it. After selecting a line the centreline will be added with an arrow indicating the direction:
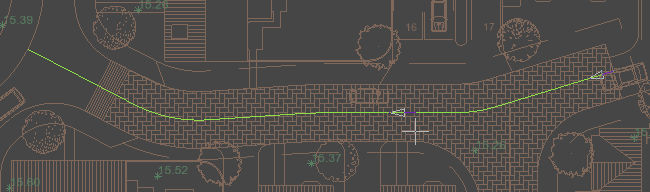
The arrows indicates the forward chainage direction of the centreline, which determines which end of the line will be set as the start chainage for the centreline. The direction shown depends on which end of the centreline the mouse is closer to, you can move the mouse closer to the opposite end of the centreline to reverse the direction:
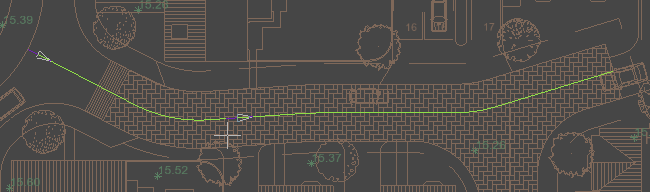
Click to add the indicated centreline:
The select line tool will copy all of the points and arcs from a single polyline as they exist in the layout. Because of this, some layouts may not be optimal for selecting in this way.
Another approach to quickly add a centreline is to start by using Snap to Point to snap to the start point of the centrelne, switch to Snap to Arc, then snap to each of the arcs on the layout, and finally switch back to Snap to Point to select the end point of the centreline.
Note: Avoid placing IPs on the ends of arcs. Doing so would allow the centreline to become non-tangential.
With Snap to Arc selected, the arcs highlight as you move the mouse near and you can click to add to the arc IP centreline path:
If you select an arc IP point with snap to arc enabled, the IP point will be filleted using the radius from the selected arc when the next point along is added.
Note: You can also use the various snap options on the snap toolbar, and make temporary construction lines using the construction line toolbar.
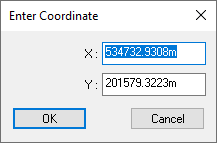
Also, you can right-click the mouse to get a menu where you can select Enter Coordinate to type the desired coordinate on the keyboard.
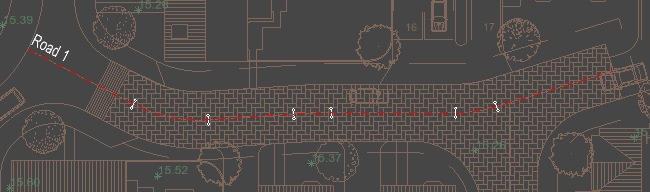
When you have finished placing the IP points for your road centreline path, right click the mouse and select Finish from the menu. The new road centreline shows as a red line on the drawing.
The vertical alignment of the centreline will initially be a straight grade from start to end along the horizontal path. The start and end levels are automatrically taken from the survey ground heights at the start and end points. To design the vertical alignment of the road use the Centreline Longsection facility.
You can enhance the road with the following options from the toolbar: