Construction lines can be placed relative to existing items on the drawing to determine precise coordinates when placing design items, especially when used in combination with the Snap Tools.
The Construction Line toolbar is available when a command is active (for example, the New Centreline command). When no command is active the construction toolbar buttons are inactive.
Construction lines are temporary and are cleaned off the drawing when no command toolbar is active.
Click two different points on the plan view and a construction line is drawn passing through them both. It is usual to use on the Snap Options when selecting the two points, as you will normally want the construction line placed relative to other features on the drawing.
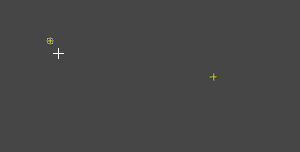
Hover the cursor near the first point, using with Snap to Point option also active.
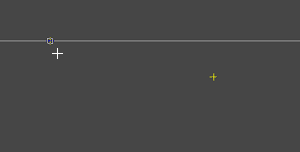
Click and the construction line appears and follows the cursor until you click the second point.
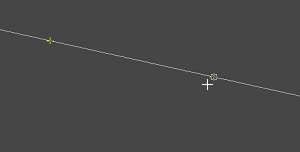
Hover mouse near the required second point with the Snap to Point option also active.
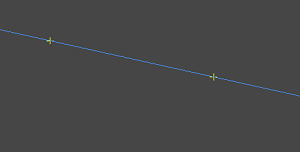
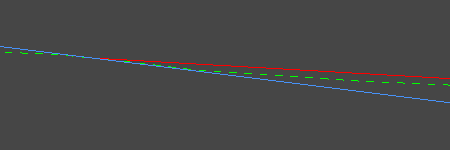
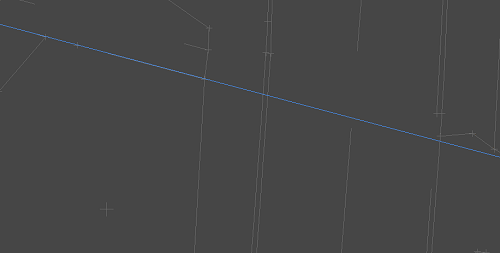
After clicking the second point the construction line is shown in blue, passing through the two chosen points, and extending off the view in both directions.
The 2 point construction line can also be used in the longsection view. This can be easily accessed from the construction line tools on the right hand side of the longsection view.
After selecting the 2 point construction line, you can right click in the longsection and select the Enter Gradient option to bring up a gradient input window. After setting the gradient and clicking OK, the construction line will be locked to that gradient.

The construction line will follow the mouse cursor whilst staying locked to the entered gradient.

You can also use the snaps to help position the desired line.
Click to add the shown construction line.
If you click to set the first point before using the right click option to set the gradient, the construction line will added immediately after entering the gradient. This will create a construction line which passes through that first point at the specified gradient.
A construction line can be placed parallel to an existing line, offset at a specific distance.

When you enable the ![]() Parallel Construction Line option, a prompt for the Offset is shown at the bottom left corner of the plan view window.
Parallel Construction Line option, a prompt for the Offset is shown at the bottom left corner of the plan view window.
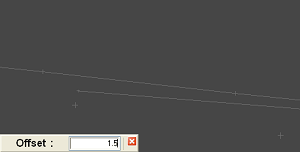
Enter your required offset for the parallel line. If you have used the option previously, the last offset will be shown by default.
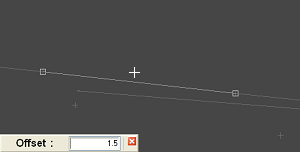
Hover the cursor near a line. The line will highlight to indicate that it would be selected when you click the mouse.
Click the mouse and the construction line is indicated.

The construction line is offered on whichever side of the selected line you place the cursor.
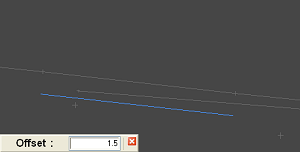
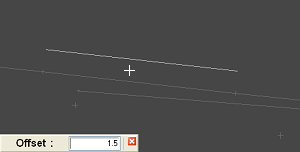
After clicking the mouse the construction line is shown in blue.
It is often useful to extend an existing line on the drawing, for example, to show where it intersects with another feature.

Hover the cursor near a line. The line will highlight to indicate that it would be selected when you click the mouse.
After clicking the mouse a construction line is shown in blue over the top of the selected line. The construction line extends beyond both edges of the view.
There are three types of tangential construction line: a tangent line from a point to an arc, a tangent line touching two arcs, or a tangent arc of known radius toughing two arcs.
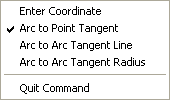
You can choose which type of tangent you want to place from the right-click menu.
First select an existing arc or circle on the drawing. They will highlight as you move the cursor near. Click to select.
Next select a point. You can use the Snap Options to latch to an existing point. As you move the cursor the proposed construction line will move around the arc, extending to the cursor position. Click to place the construction line.
Note: There are two possible construction lines from a point to a circle. It will be the one towards the point where you clicked to select the arc.
First select an existing arc or circle on the drawing. They will highlight as you move the cursor near. Click to select.
Then select another arc or circle on the drawing. As you move the cursor, the proposed construction line will show. Click to place the construction line.
Note: There are four possible construction lines between two circles. The one offered will be the line which is closest to the cursor position.
First select an existing arc or circle on the drawing. They will highlight as you move the cursor near. Click to select.
Then select another arc or circle on the drawing.
Then select which tangent solution you require. The choices will appear as you move the cursor in between the two selected arcs. Click to select.
Note: There are eight possible construction arcs between two circles. The one offered will be the arc which is closest to the cursor position.
This option allows you to place a construction circle on the drawing. There are two ways to make the circle:
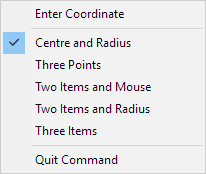
You can choose which way to make the circle from the right-click menu.
First select the centre point for the circle. You may want to use one of the Snap Options to latch to an existing feature.
After selecting the centre point, the circle will stretch to pass through the cursor position. As you move the cursor, the offered circle will increase or decrease in radius accordingly. Click to place the construction circle. Or, to enter a specific radius, you can right-click and pick the "Enter Radius" option from the menu.
Simply select three points in succession (you may want to use the Snap Options to latch to existing features) and a construction circle will be placed which passes through all three points.
You will be prompted to select two items (either straight lines or arcs).
After selecting the two items, the circle will stretch to pass through the cursor position. As you move the cursor, the offered circle will move accordingly accordingly, so as to be tangential to the two items and pass through the mouse position. Click to place the construction circle.
You will be prompted to select two items (either straight lines or arcs). After selecting the two items, you will be prompted to enter the required radius.

After entering the radius, the tangent circle will be shown near to the cursor position (if any tangent solution exists for the given items and radius).
There may be multiple tangent circles that touch the two items with the given radius. As you move the cursor around, the nearest solution is displayed. Click to place the construction circle.
You will be prompted to select two items (either straight lines or arcs). While selecting the third item, the tangent circle will be shown near to the cursor position (if any tangent solution exists for the given three items). Click to place the construction circle.
This option allows you to delete construction lines that you have placed. After selecting this tool, click a construction line to delete it.
The Delete All option on the right-click menu will delete every placed construction line.