The snap tools allow you to position items accurately relative to the drawing, rather than positioning items at the free-hand cursor position.
The snaps toolbar is positioned at the top of the main window.
The snap options are available at any time when you are prompted to select a position on the plan-view. For example, when you are placing a centreline point, or when you are moving a manhole.
When a snap option is active you will see a small target square appear on the drawing near to the cursor position. As you move the cursor around the drawing, the target square moves to the nearest appropriate location. The target square indicates the actual position that would be selected.
Snap to any point on a visible object on any of the imported sub-models, or on the design model.
For example, snap to point will snap to the end of a line or arc, any point on a polyline, a point on the boundary of a hatch, a text insertion point, a centreline IP position, and so on.
Snap to the intersection point of any two line or arc objects which visually cross each other.
Note: If the the two lines don't cross, and you want to snap to the point where the extended lines would cross, then first use the construction line tools to extend the lines so that do cross.
Snap to the closest point which lies on the line or arc nearest to the cursor position.
Note: This can be useful when selecting an offset if an imported layout contains a line indicating the required offset. For example, when using the 'Pick' option for the road width on the Channels/Kerbs/Footways window.
The snap to perpendicular option works slightly differently to the other snap options. It's operation is as follows:
Note: This can be useful for placing a perpendicular construction line.
Snap to the intersection point of the tangent lines at the arc end points.
When using a function that requires identification of an arc, this option can be used to choose one from the drawing. For example, when adding a new centreline, you can use this option to snap to the arcs of a centreline on an indicative layout, getting both the IP position and the radius at the same time.
Snap to the centre-point of the arc closest to the cursor.
Snap to the mid-point of the line closest to the cursor. The mid-point is the point on the line, half-way between the line end points.
Snap to Orthogonal can be used when specifying the second point of a line. When Snap to Orthogonal is in operation, the target box position will bias towards the exact east - west and north - south directions from the other end of the line. This makes it easy to construct lines at the 90 degree angles on-screen.
Additionally, the north-east - south-west and north-west - south-east directions are biased towards. This makes it easy to construct lines at the 45 degree angles on-screen.
Snap to the mid-point between two other points. When using this snap option, you identify any two points on the drawing, and the position taken is the point mid-way between them.
Note: This can be useful for positioning points on a centreline midway between indicative channel lines.
This snap option operates in two different ways which can be chosen from the right-click menu:
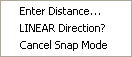
When Linear Direction is active it will prompt you to select a line and then enter a distance. The target box will then be at the given distance extended beyond either end of the line.
When Linear Direction is not active it will prompt you to select a point and then enter a distance. The target pox will then appear on a circle of given radius around that point.
Snap To Decimal Length can be used when specifying the second point of a line. When Snap To Decimal Length is active the distance from the previous point is shown next to the cursor, rounded to the nearest decimal place. The target box is shown at the position where the line length would be exactly that shown.
The number of decimal places shown depends on the zoom scale of the drawing, such that when you are working close-in several deimal places of accuracy are shown, and when you're working zoomed-out the rounding is much coarser.
This snap option helps you to easily place lines of an extact length without any construction or measuring required.
Snap To Perpendicualr Lines works in conjunction with the new line commands. After placing at least two points of a line you can then snap along the extensions of that line or snap to perpendicular lines at the placed points.
This snap option helps you to easily create lines that have 90 degree bends or have parallel sections. For example, this helps to create rectangular tanks or ponds.