A secondary channel is used to add design features like laybys and parking bays to the the side of a road or footpath. In particular this is used where the grade of the feature is different to that of the main road carriageway (for example, where a parking bay's grade falls to the primary channel) or where the feature has an upstand (small kerb) at the join with the primary channel. The secondary channel defines the shape of the design feature.
Whereas there is only one primary channel along each side of a road, there can be a number of secondary channels, each covering a partial range of the road's length.
Site3D provides a set of tools to allow the engineering design of virtually any shape of road feature. Site3D remembers the geometry of your design, so that if you should need to move the road centreline afterwards then the shape of the channels will automatically follow.
Secondary channels differ from primary channels in that they are designed relative to another channel line rather than to the road centreline. They also allow an optional upstand, and you may specify a different grade to that of the main carriageway.
Note: It is possible to build up complex designs by adding secondary channels to secondary channels.
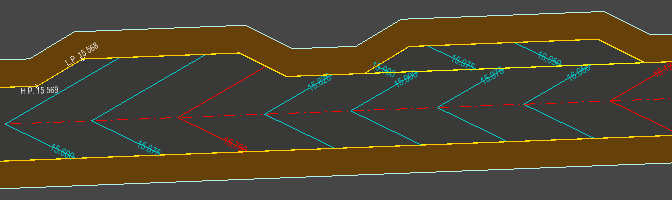
The example below shows the difference between a primary channel feature (left) and a secondary channel feature (right):
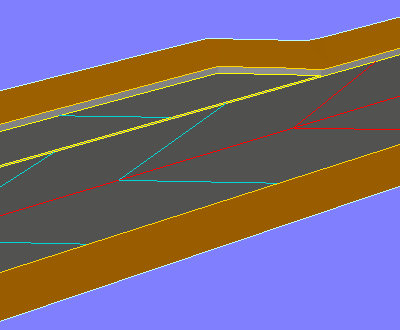
And an example secondary channel in 3D, with exaggerated features to show the upstand at the primary channel:
To access the tools for modifying road secondary channels click the ![]() button, or select the Secondary Channels Tools... option on the Road menu.
button, or select the Secondary Channels Tools... option on the Road menu.
You will see this toolbar appear on the top left of the plan view window:


The process for adding a secondary channel is identical to that of adding a primary channel, excepting that you must first select the primary (or secondary) channel off which it is to be designed.
![]() Add secondary channel
Add secondary channel
![]() Edit secondary channel
Edit secondary channel
![]() Secondary Channel Properties
Secondary Channel Properties
![]() Delete Secondary Channel
Delete Secondary Channel
![]() Click this button to close the toolbar
Click this button to close the toolbar