Edit Channel Horizontal Design button. Then select a channel or back-of-footway line to modify.
The Widening tool is available when editing the horizontal design of a channel or footway. From the ![]() Channel Tools click on the Edit Channel Horizontal Design button. Then select a channel or back-of-footway line to modify.
Channel Tools click on the Edit Channel Horizontal Design button. Then select a channel or back-of-footway line to modify.
From the channel edit toolbar, press the ![]() Widening button.
Widening button.
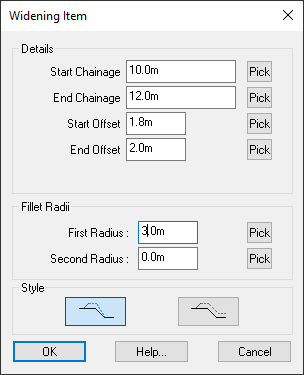
The following window is shown:
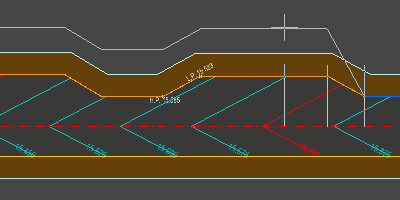
As you move the mouse over the Plan View you will see that the chainage selector is in operation on your chosen design line. It is awaiting you to pick the chainage position where you want to start widening or narrowing.
After you have picked the start chainage, it will be awaiting for you to pick the end chainage, where your widening/narrowing is to stop.
After picking the end chainage, it will be awaiting you to pick the final offset. As you move the mouse you will see where the design line would be placed when you click.
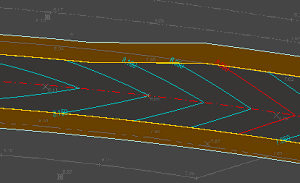
This image shows a widening being specified on the upper (left) road channel. The widening starts on the left side of the image, and widens towards the right side of the image.
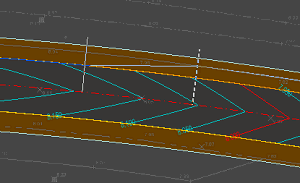
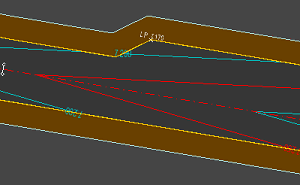
This image shows the proposed channel modification after the user has clicked the OK button on the Widening Item window.
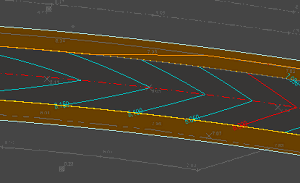
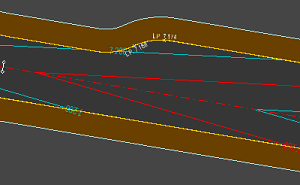
This image shows the resultant road widening after the Apply Changes button ![]() has been clicked on the Channels toolbar.
has been clicked on the Channels toolbar.
When you click the OK button on the Widening Item window you will be shown the new path of the Channel/Footpath but the road will not yet be recalculated to use it. This is because you may want to make several changes to the Channel/Footpath design before applying it to the road. For example, if you are specifying a parking bay then you will want to put in both a widening and then a narrowing to bring the road width back.
Click the Apply Changes button ![]() when you have finished modifying the Channel/Footpath design.
when you have finished modifying the Channel/Footpath design.
Your road will then be recalculated to use the new design in both 2D and 3D, and any other aspect of the design (for example a nearby junction) will be automatically recalculated to accomodate the changes.
In previous versions of Site3D it was possible to set the widening style as either a straight line widening or a Follows Curve widening. The follows curve option has since been removed as this generated a spiral curve, which is rarely the correct engineering solution for a widening around a corner.
The Follows Curve widening style will be used if it was previously set in an existing project, in order to retain the same design. Where this option was previously used, you will still be able to change an existing Follows Curve widening to a Straight Line widening. However, you will not be able to add any new widenings with the Follows Curve setting.
For a widening around a corner see the Mitre Corner channel editing tool.
A widening can be designed with both a lead-in (First radius) and a lead-out (Second radius) arc.
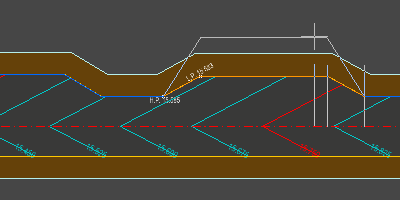
This image shows a Channel widening with no radius specified for the start or end of the item.
This image show the same Channel widening with 5m radii specified for both start and end.
The widening style changes how the widening affects widenings further along the road.
![]() This widening style will only modify the channel offset up to the next channel item.
This widening style will only modify the channel offset up to the next channel item.
![]() This widening style will offset the channel for the rest of the road, shifting all following channel items by the widening amount.
This widening style will offset the channel for the rest of the road, shifting all following channel items by the widening amount.