Junction kerb returns are generated automatically, with optimal vertical levelling. However, in certain cases, you may wish to force a low or high point at a certain position on the channel.
To create a forced low or high point click on the Junction Toolbar ![]() button which will show the junction Junction Toolbar.
button which will show the junction Junction Toolbar.
Click on the Add Low Point / High Point tool ![]() .
The tool prompts you to select a junction side by highlighting the channel line as you move the mouse close. After selecting a channel line, select a chainage location on the channel. The following window will appear:
.
The tool prompts you to select a junction side by highlighting the channel line as you move the mouse close. After selecting a channel line, select a chainage location on the channel. The following window will appear:
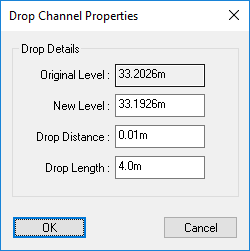
This is a non-editable item showing the original level on the channel at the selected chainage and is for reference only.
You can specify with the new level, or the change in level. Changing the New level will automatically alter the value in Drop Distance and vice versa, so you only need to change one or other value. These values specify how low or high the altered channel will deviate from the original automatic level. To raise the level, you specify a negative drop distance.
The Drop Length specifies a plan distance over which the levels are linearly adjusted up or down from the original automatic levels. The lowest or highest point will be at the selected chainage and the Drop Length will be split equally either side of this chainage location.
Click OK. The design and display will automatic update to show the changes.
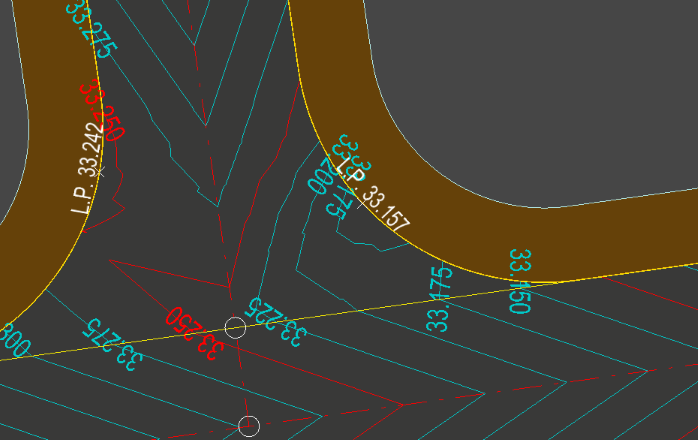
Here is an example of a junction before any alterations:
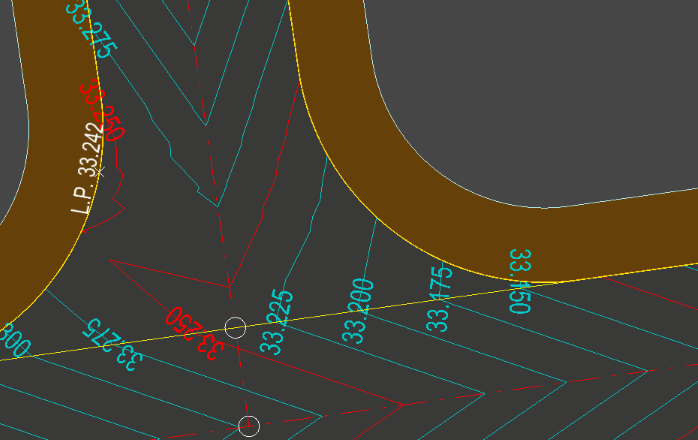
Here is an example of the junction after a manual low point is added: