 Edit Junction Dimensions tool on the
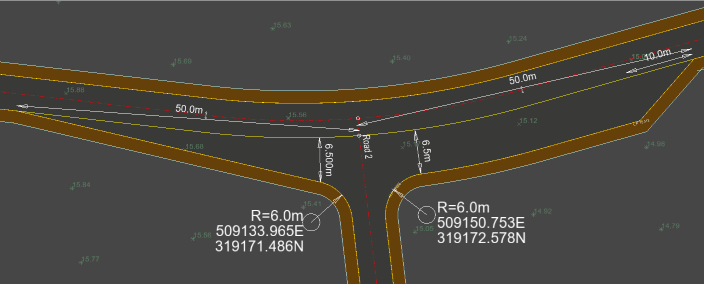
 By default, junctions are created with as standard "T-Junction", as per this example:

You can easily add a lane or taper to the entry and exit sides of the junction.
To alter the style of a junction to a lane or taper, use the Edit Junction Dimensions tool on the ![]() junction tools toolbar.
junction tools toolbar.
Once in this tool, right click over the left or right side of the junction to see the following menu:
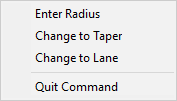
Select either Change to Taper or Change to Lane to change the junction style.
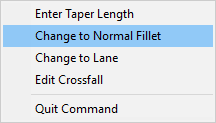
NOTE: It is always possible to change a taper to a lane, lane to taper or revert a lane or taper back to a normal fillet by right clicking over the appropriate side of the junction whilst in the Edit Junction Dimensions tool.
To specify or alter the lane/taper length, width or fillet radius, select the Edit Junction Dimension tool, and select the relevant dimension item on the plan-view with the mouse (left click). You will then see the design stretching as you move the mouse. Left-click the mouse again to confirm the new length, width or radius.
You can specify exact lane/taper length, width, radius or crossfall values by right-clicking the mouse whilst in the Edit Junction Dimensions tool: From the menu, select either the Enter Lane/Taper Length, Enter Lane/Taper Width, Enter Radius or Edit Crossfall option. This will ask you to enter a value, then update the junction instantly.
The example below shows a taper on the left and a lane on the right with their appropriate dimension annotations which can all be edited in the ways described above.