 Edit Channel Horizontal Design button. Then select a channel or back-of-footway line to modify.
The Delete Item tool is available when editing the horizontal design of a channel or footway. From the ![]() Channel Tools click on the Edit Channel Horizontal Design button. Then select a channel or back-of-footway line to modify.
Channel Tools click on the Edit Channel Horizontal Design button. Then select a channel or back-of-footway line to modify.
From the channel edit toolbar, press the ![]() Delete Item button.
Delete Item button.
You can now use the mouse to select a channel/footway item.
Note: This tool does not delete amorphous items. Click the Delete Amorphous button ![]() to delete an amorphous item.
to delete an amorphous item.
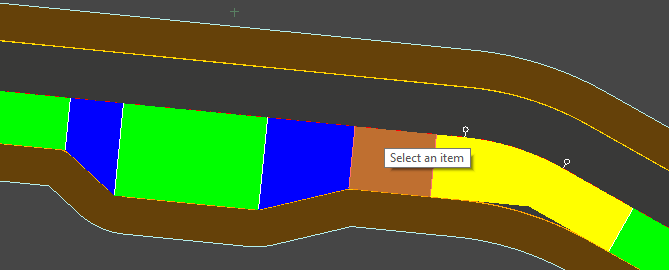
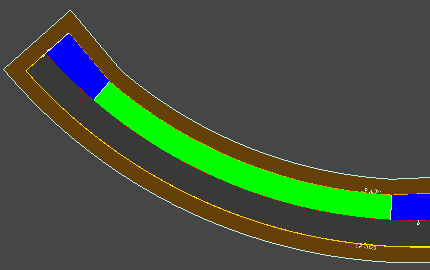
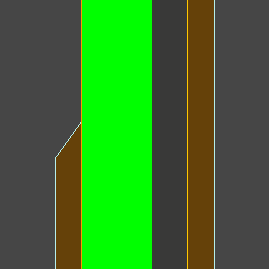
As you move the mouse you may notice the items drawing in different colours. Green items are Parallels, blue items are Widenings/Narrowings, and yellow items are Mitre Corners. The item that the mouse is currently over is indicated with a red/orange highlight.
You can then click the highlighted item to delete it. However, there are some situations where the selected item cannot be deleted:
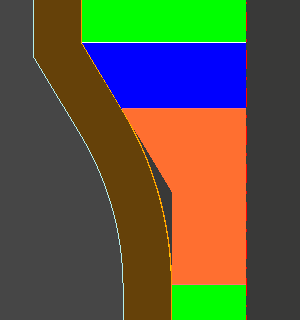
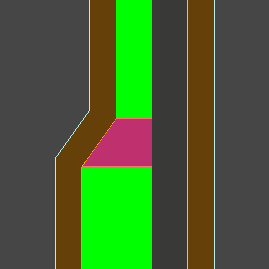
When a mitre is deleted the surrounding items will be extended to the intersection point of the mitre:
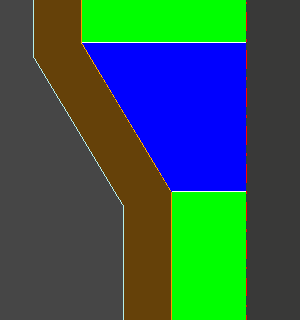
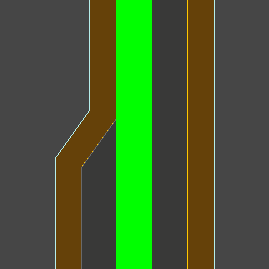
When it is not possible to extend the surrounding items to the intersection point, the mitre is deleted and replaced with a single parallel. For example, when there is no possible intersection within the mitre chainage range, or when the mitre IP is on the opposite side of the centreline:
Note: When any new item is added, any existing items that are fully overlapped are lost. Deleting the item that replaced them will not restore the original items.
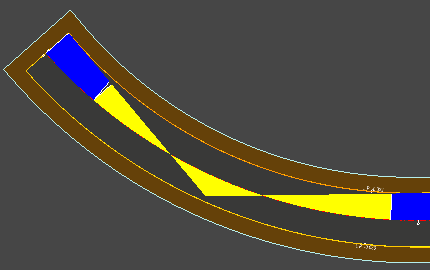
When any other item is deleted it is replaced with the constant offset from the previous item. For example, deleting a widening that was added to a parallel will result in a single parallel:
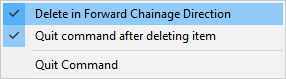
The offset which is used in this situation is based on the forward chainage direction of the centreline. This can be toggled from the right click menu to work in the reverse chainage direction:
Using the same example as above, except with the "Delete in forward chainage direction" option un-ticked, the next items offset will be used instead:
The right click menu also allows you to toggle whether the command finishes after deleting an item. If you untick "Quit command after deleting item", you will stay in the command and can delete multiple items in a row.