Some useful information tools are available by clicking the Additional Tools ![]() toolbar button. The following toolbar is shown:
toolbar button. The following toolbar is shown:


This is useful for quickly measuring the length or size of a drawing feature.
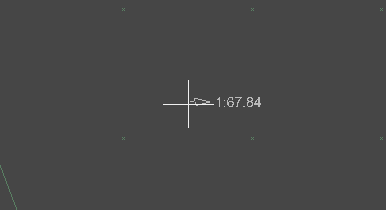
Click on the drawing to choose the start location for the measurement. As you move the mouse, a line will stretch from the first point to the mouse position. The current line length is shown next to the mouse:
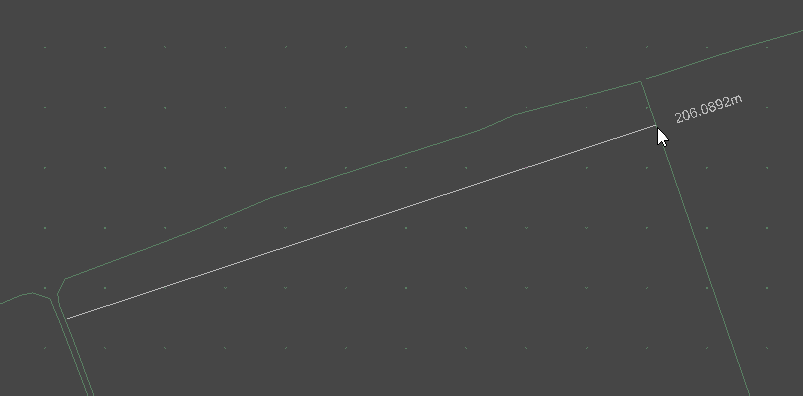
NOTE: The snap options may be used to latch onto visible features on the drawing.
Click again to choose the second point for the measurement. The following window is shown, indicating the plan length between the two points, as well as the total trip length:
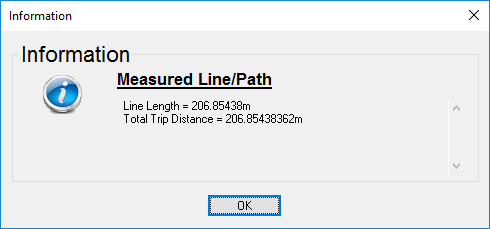
Click OK to dismiss the window and continue clicking points to measure a combined path length. Right click and select Quit Command to finish.
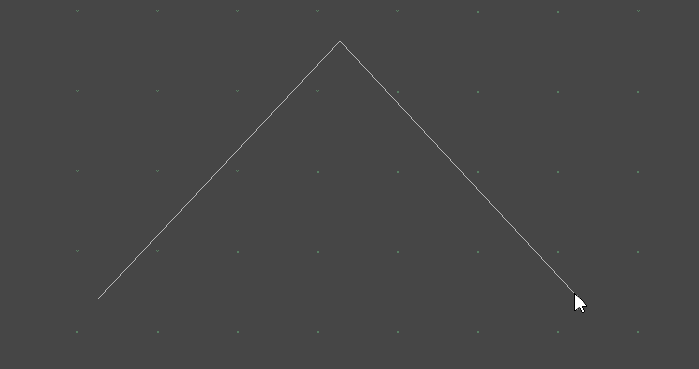
The Measure Angle facility will return the subtended angle between three points.
Click to specify the starting location. Click a second time to specify the mid point and click a third time to specify the end point.
NOTE: The snap options may be used to latch onto visible features on the drawing.
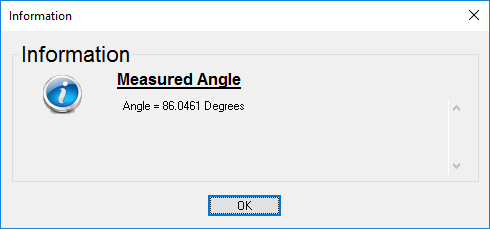
After choosing the third point a window is shown indicating the subtended angle between the three points.
The Check Arc Radius tool shows the radius of the nearest arc.
When the Check Arc Radius tool is active, the nearest arc is highlighted and the radius is displayed slightly offset from the arc. A line is also drawn from the nearest point on the arc to the centre of the circle that the arc would form.
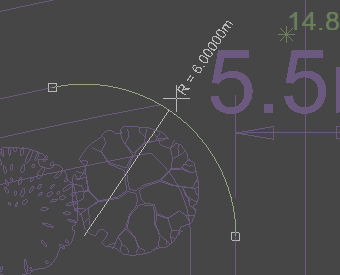
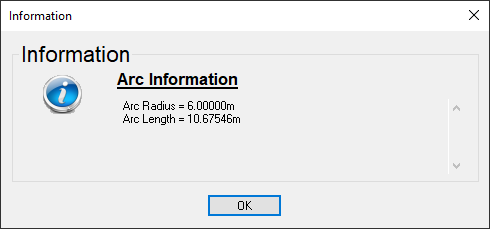
Clicking the mouse when an arc is highlighted will bring up a window showing the radius and length of the selected arc.
With the Measure Surface Level tool you first select a surface you want to check the levels of. Then the level of the surface point directly underneath the mouse position will be shown next to the cursor.
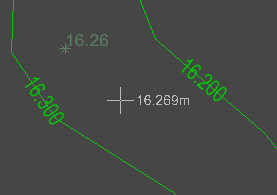
From the right click options menu, the Select Surface option allows you to change to a different surface.
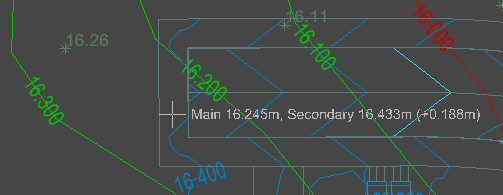
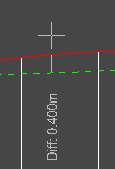
Also on the right click menu, the Select Secondary Surface option allows you to check and compare the levels of two surfaces. After selecting the second surface, the cursor annotation shows the level of both surfaces as well as the difference in level.
In the longsection view this tool will automatically annotate the level difference between the proposed design levels and the existing ground surface.
Clinking the Measure Grade tool will bring up a surface selection window to pick which surface you want to interrogate the grade of.
After selecting a surface, the surface gradient of the point directly underneath the mouse position will be annotated with an arrow indicating the downhill direction.
You can also measure the gradient between any two points on the current survey.
After you have clicked one point, a line will stretch from that point to the mouse cursor position. The gradient annotation is then the gradient from the first point to the point under the mouse position.
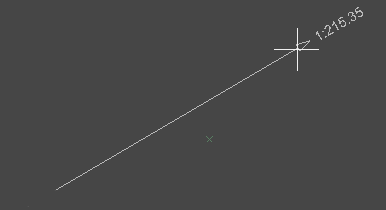
The gradient is calculated by using difference in level on the selected surface, between the first and second coordinates, and the plan distance between the same two points.
Clicking a second time will temporarily lock the line and gradient annotation allowing you to keep it on screen.
The tool automatically resets, waiting for you to click again. To finish, press the Escape key, or right-click and select Quit Command from the menu.
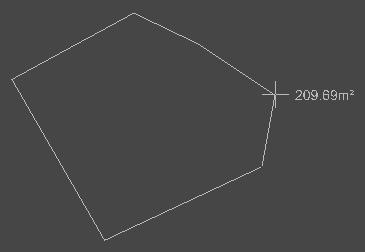
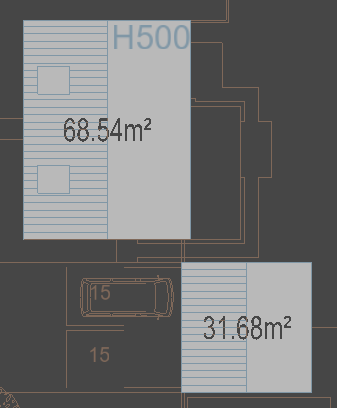
With the Measure Area tool you can draw a closed boundary line to see the 2D area inside the enclosing boundary.
As you draw, the current area will be shown next to the cursor. Click to add the point under the cursor to the area boundary.
On the right click menu you can select Finish Area to stop adding points to the current area boundary. Only the points that you have clicked to add will be included in the finished area, the point directly under the cursor is not included unless you click to add this point.
The finished areas are shown as shaded regions with the area shown at the centre of the enclosing boundary. These areas kept as long as the command is active.
Use this tool to see the properties of any item on the drawing.
After starting the tool, select an item from the view. They will highlight as you move the mouse around. When you select a highlighted item, the following window is shown, displaying relevant property information:
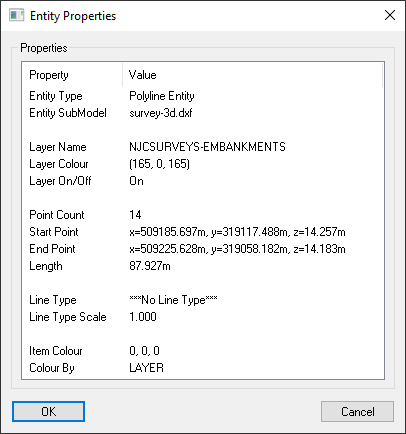
Click OK to dismiss the window. Then select another item, or right click and choose Quit Command to finish.