Each imported model is drawn in a distinct colour for the project. This makes it easy to see which model is which on the views.
Additionally, each 3D model can have its surface displayed in a variety of ways.
To see the Model Colours window, click the ![]() Surface Colour Properties button on the top toolbar.
Surface Colour Properties button on the top toolbar.
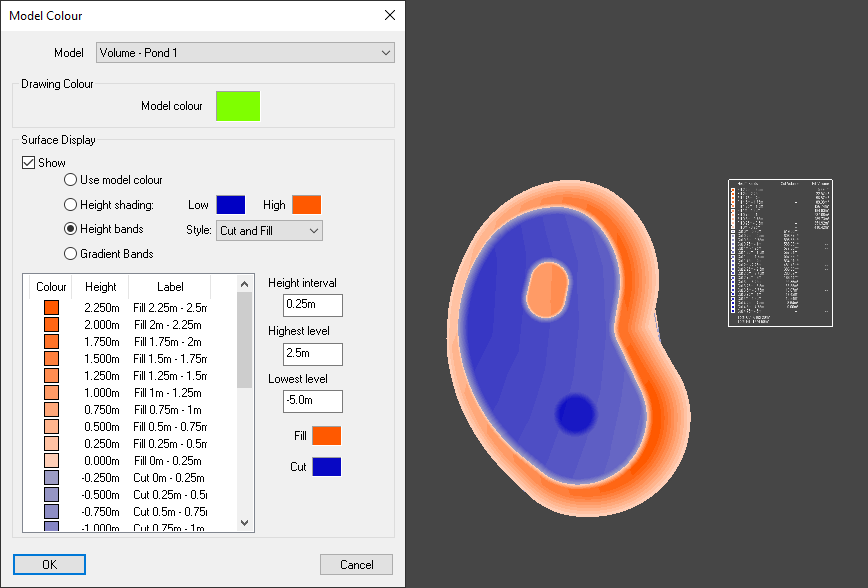
By default, the current survey model is shown, but you can choose from a list of all the imported models. When you change the model selection it will show you the current colour details for that model.
Each model is drawn with a distinct colour to make it easy to distinguish the different models on the views.
Click on the coloured button to re-choose the model colour. The colour is used for drawing the entities (lines, arcs, text, hatches, etc.) in the plan and 3D views.
Note: If you want to draw a model by its original layer colours, instead of this model colour, select the model's By layer tick-box on the layers window. Or use the ![]() Colour by Layer button on the top toolbar to toggle all models to draw by layer colour or model colour.
Colour by Layer button on the top toolbar to toggle all models to draw by layer colour or model colour.
This option shows or hides the coloured surface for this submodel. When selected, the model's coloured surface is shown on the plan view, using the current colouration choice.
Note: When the Show option is selected, if this surface is also selected for viewing in the 3D view, then its colouration will be the same as the plan view (otherwise the 3D view uses the model colour to display the surface).
Note: If Show is selected here, then the same colouration will be used to display the surface in the 3D View, otherwise the 3D View uses the model colour to display the surface. Whether the surface is displayed in the 3D View is controlled by the 3D Surfaces right-click menu.
Note: You can display the surface of the Current Survey model at any time by clicking the ![]() button on the top toolbar.
button on the top toolbar.
The surface will be drawn on the Plan View and 3D View with shades based upon the model colour. This can be useful to distinguish which surface is which in the 3D view.

Higher levels are shaded in lighter shades of the model colour and lower levels are shaded darker.
When using the Survey Height Shading facility the Plan View and 3D View represents the survey surface heights as smoothly grading colours, indicating high through to low levels.
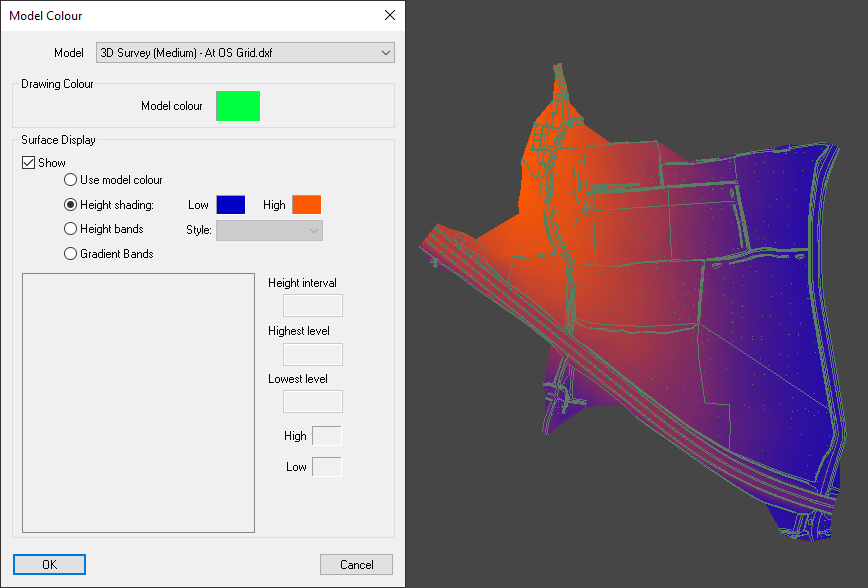
By default the colour scheme is bright orange for highest levels, grading through to dark blue for lowest levels. You can change these two colours by clicking on the corresponding colour patch on this options window. The result is shown instantly on the Plan View window (if Survey Height Shading is in effect).
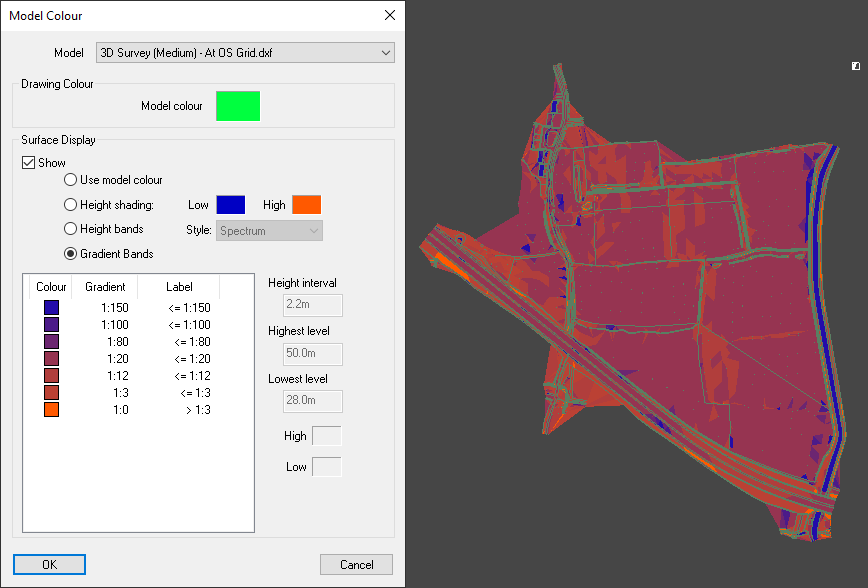
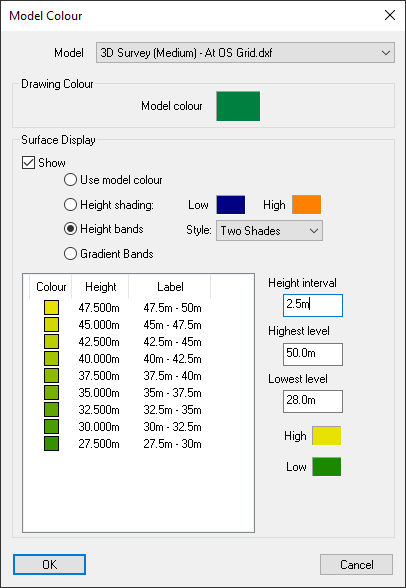
When using the Survey Height Shading facility the Plan View and 3D View represents the survey surface heights as banded coloured areas to indicate high levels through to lowest levels.
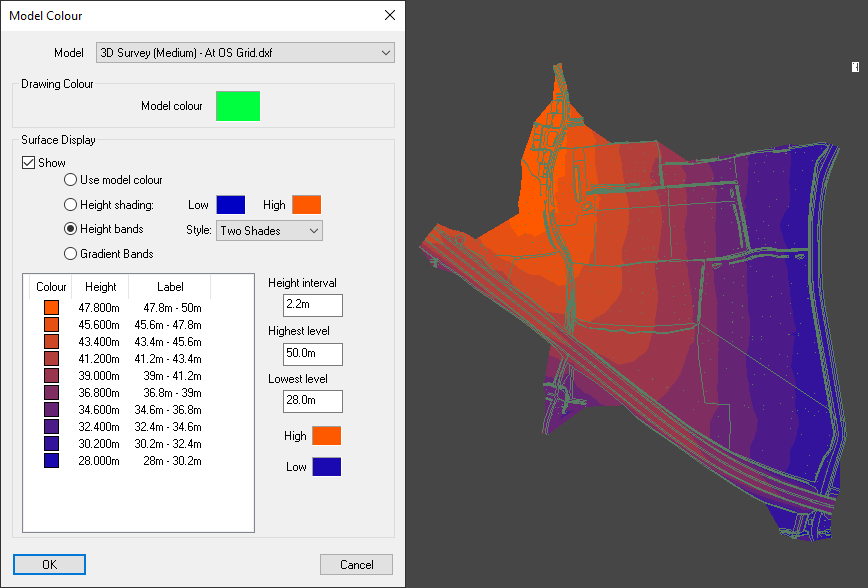
The default height band style is set to the Two Shades option, this gives a band range between the High and Low colours to the right of the colour bands.
A new set of height bands will be generated automatically if you change the Height Interval, Highest level, Lowest level, or the colour boxes to the right of the height band list. You can also manually edit a height band by clicking on a Height, Label, or Colour box within the list:
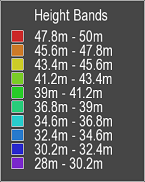
The following example shows the Spectrum options which colours the bands in the colour spectrum with red as the high colour through to violet as the low colour.
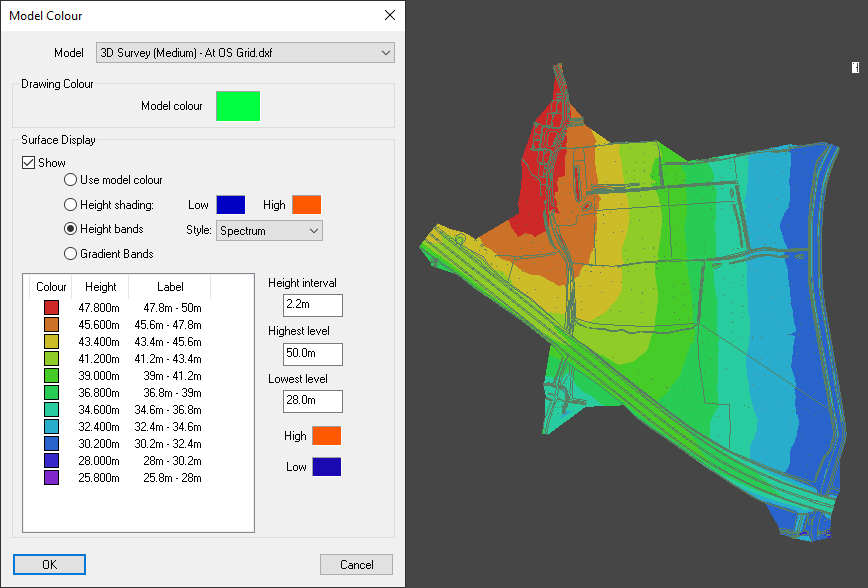
Height Bands are very similar to Height Shading except the colours are stepped rather than smooth transitions and there is a key drawn on the plan to indicate what height range each colour band represents.
The colour bands can be exported to DWG/DXF/Push-to-CAD and will appear in the CAD drawing as HATCH entities (one for each colour). Select the SURFACE_COLOURS layer when exporting:

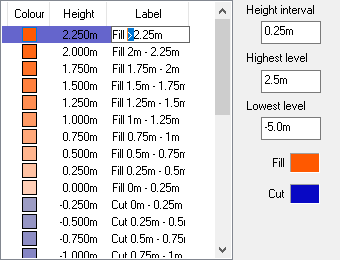
If the model represents cut/fill depths (for example, when saved from the Surface Volumes facility), then the Cut and Fill Height Band option will show you the various depths of cut and fill. This is sometimes referred to as an isopachyte drawing.
Further to the edits for Height Bands, a zero band can also be toggled. The zero band colours regions where there is zero cut or fill.
The gradient band option is very similar to the height band option but the surface triangles are coloured based on the gradient of the surface.