The Pipe Properties Schedule window shows an editable list of settings for all the pipes in the selected network.
On the ![]() drainage tools toolbar, click the
drainage tools toolbar, click the ![]() Pipe Network Properties button. Then select the drainage network that you want to see the pipe properties for.
Pipe Network Properties button. Then select the drainage network that you want to see the pipe properties for.
After picking a drainage network you will see the following window appear:
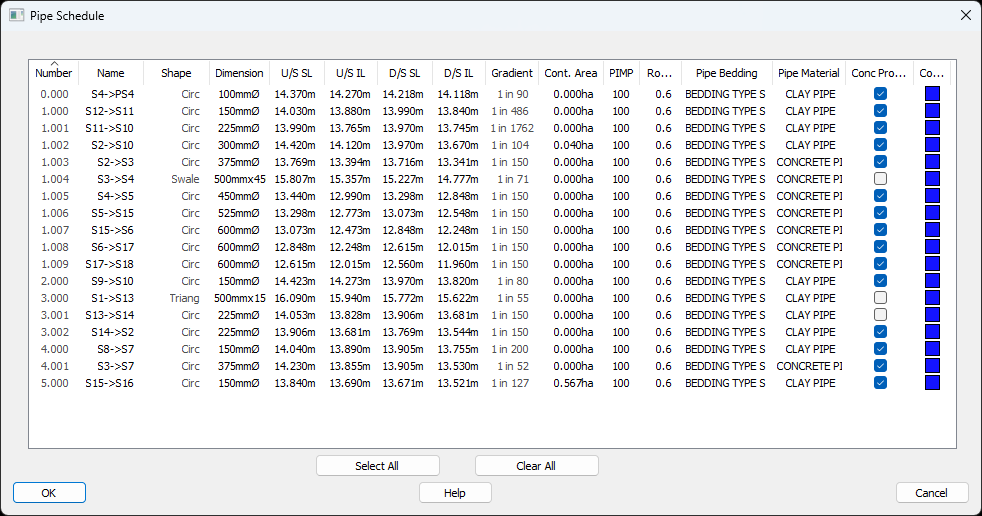
You can zoom to the location on plan of any item in the list by clicking the find icon  at the start of each row.
In the list area you can click on the cells to modify the properties of any pipe in the selected network.
Clicking on an cell containing editable text or an editable value will show a textbox that can be type into in order to change the property. When a textbox is shown, pressing enter will save the modified property.
For example, to change the invert level of a pipe, click on the invert level in the table, type in a new level, then press enter to apply the change.
Multiple rows of the list can be selected by first clicking on one of the pipes, this may bring up a text edit but this can be ignored. After selecting a pipe you can then hold shift and click on another pipe to select all the rows between and including the selected pipes.
Alternatively, you can select an initial pipe and then hold control (Ctrl) to add another pipe to the selection one at a time. This way the selection does not have to be sequential.
With multiple rows selected you can then click on one of the properties of a selected row to change it for all the selected pipes.
For example, this will allow you to change the concrete protection settings for multiple pipes all at once.
You can save out the current state of the properties list using the Save to CSV button. All columns and rows will be exported out as Comma Separated Values (CSV) that can be viewed in a spreadsheet program of your choice (like Excel).