The borehole tools can be used to create surfaces for the sub-strata under your site. These surfaces are visible in the 3D View and also appear on your long-section drawings.
Borehole, or trial pit, information can be added manually using these tools, or imported from an AGS file, using the File->Import menu option. Site3D currently supports AGS file format v3 and v4.
When importing boreholes from a file or manually adding using the tools below, each borehole cover level is automatically calculated from the current survey. To avoid unexpected substrata changes, this cover level is retained when the current survey is replaced or modified. A borehole's cover level is automatically updated using the current survey if its properties are manually changed with the Edit Borehole tool.
After entering the borehole information, you'll need to add a boundary in order to generate the sub-strata surfaces. See below.
To see the borehole tools, click the ![]() toolbar button.
toolbar button.


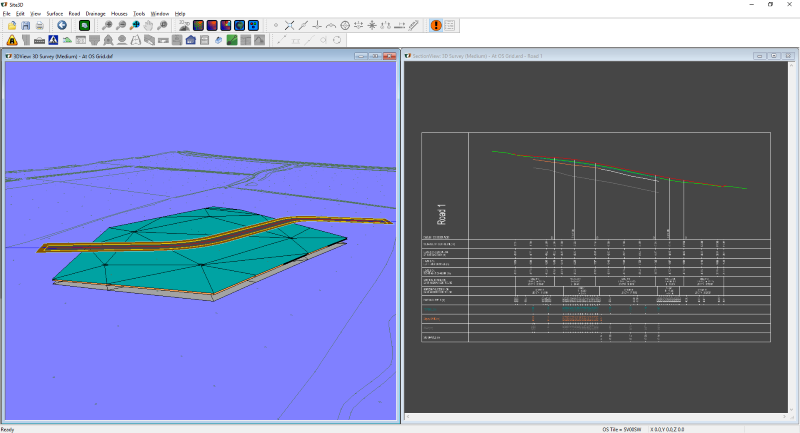
The example below shows the 3D view on the left with the ground surface turned off so you can see the borehole surfaces that have been generated and, on the right, the longsection of the road that passes over the borehole dataset showing how the substrata surfaces are automatically shown on the vertical profiles with each substrata surface level information annotated similarly to the existing ground.
 New Borehole
Click this option to create a new borehole, then left click on the plan view where you wish to add it and the following window will appear.

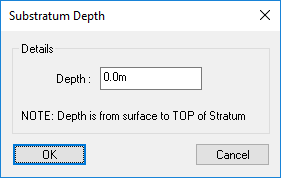
Enter a borehole name and depth in this new window then, using the Add button, insert the appropriate substratum from the Available Substratum list. The following window will appear asking how deep this substratum appears in this borehole. Please choose a depth to the top of this substratum.
If the Available Substratum list is empty or doesn't contain your required substratum type, click the New... button directly above and the following window will appear.

Choose a Basic Soil Type from the dropdown list, then choose a more detailed subtype from the Soil Details dropdown list. Choose a substratum colour by clicking on the colour and choosing an appropriate colour. You can also give this new subtratum a description if required. Click OK to add this new subtratum into the Available Substratum list.
To change an inserted substratum depth, first select the relevant substratum from the Substratum list, then click the Edit... button directly above and you will be shown the Substratum Depth window with the current depth pre-set. Edit the depth and click OK to accept the change.
Edit BoreholeClick this option to edit an existing borehole. Existing boreholes will be highlighting waiting for you to select one. When selected, the Borehole Details window is shown. See New Borehole for further details.
Delete BoreholeClick this option to remove an existing borehole. Existing boreholes will be highlighting waiting for you to select one by left clicking over it. Selecting one will automatically remove it from the substrata surfaces.
Add Borehole BoundaryAdding a borehole boundary defines how far a set of boreholes will extend their surface. A boundary containing at least one borehole must be added before any surfaces will be created.

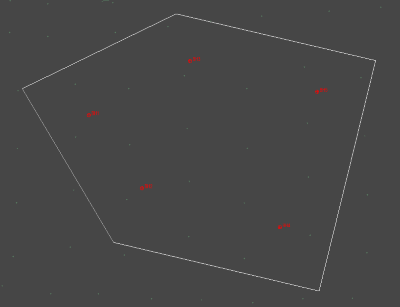
To add a boundary, click the button, then click points on the plan view to define the boundary. Right click and select the Quit Command option to finish the bounary line. Finishing the line will auto-close the boundary line so there is no need to snap the end back to the start.
As soon as the boundary is finished, and it contains at least one borehole with valid substrata information, the substrata surface(s) will be formed.
Delete BoreholeClick this option to remove an existing borehole boundary. Existing borehole boundaries will be highlighting for you to select one. Selecting one will automatically remove it and any substrata surfaces generated inside it. Any boreholes inside the boundary will remain untouched.