To change the interfacing along part of a road, first click the ![]() button on the main toolbar and then the
button on the main toolbar and then the ![]() button on the Interface Options toolbar.
button on the Interface Options toolbar.
You will be prompted to select an existing interface from the drawing. As you move the mouse cursor the nearest road interface line is highlighted. Click to select.
Note: You are selecting the interfacing from only one side of the road.
The interface properties window is displayed, showing the properties of the selected interfacing.

This window operates in exactly the same way as the Create Interface window for setting the properties of the interfacing for the new region.
There are the following extra settings:
Specify the start chainage and the end chainage for the region of interfacing you want to change. The interfacing properties which you set on the rest of the window will get applied to this chainage range, with the interfacing unchanged on the remainder of the road.
Usually where there is a change form one interface style to another you will want it to gradually change from one to the other, rather than have an abrupt level/slope change.
You can specify the length over which the gradual change should occur, both for the start of the region and the end of the region.
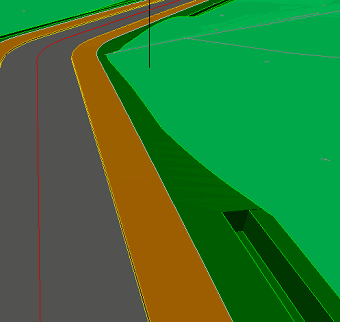
This example shows an interface region with a straight 1:3 slope which has been applied within a more complex interfacing with a ditch.
The change from one style to the other occurs over a distance of 10m, in this instance.
Your interfacing constructions are remembered by the software, so that if the road is subsequently redesigned in horizontal or vertical then the interfacing will be automatically regenerated accordingly.